When I moved from my mom's house into the house I'm living in now, a lot of my clothes and stuff ended up in big black trash bags. Coincidentally, so did some of my mom's old clothes that were headed to Goodwill, and by some stoke of luck a bag containing her old clothes and this skirt ended up with me:
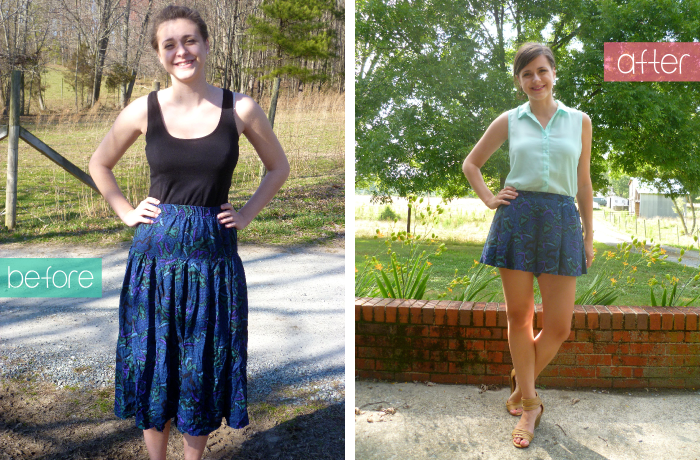
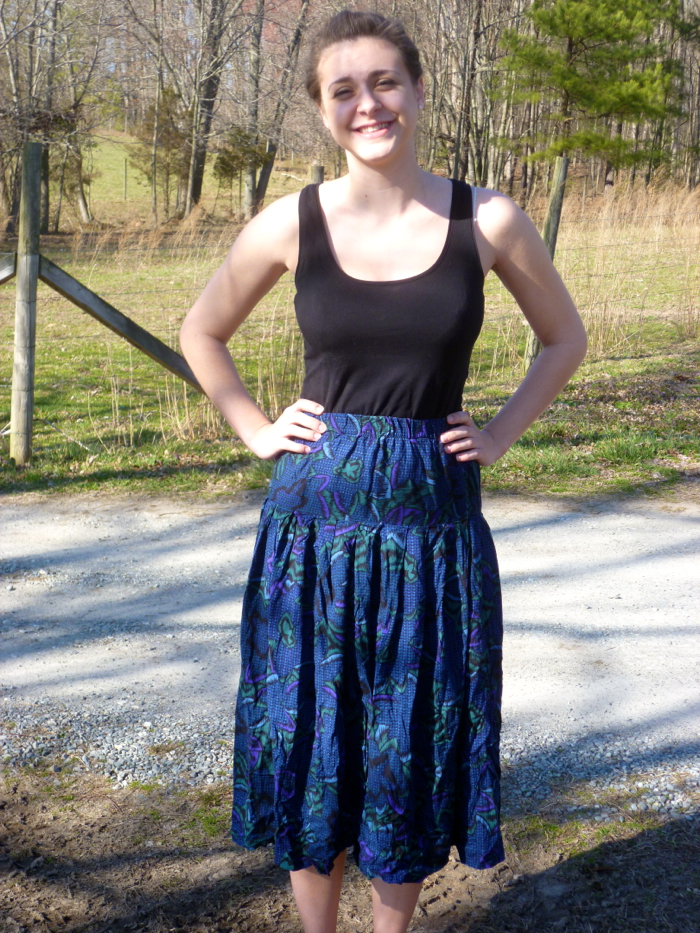 I know you're probably thinking it was a stroke of BAD luck that made me the owner of this seriously dated number, and you can tell by the look on my face in that picture that I knew I had some work to do. BUT THAT FABRIC! I immediately fell in love with the print, and it's a rayon challis so it has a lovely drape and feel. However, the elastic waistband, drop waist, and midi-length were not doing it any favors. No worries, I knew I could make it into something fabulous that I would actually wear. Enter McCall's 6965.
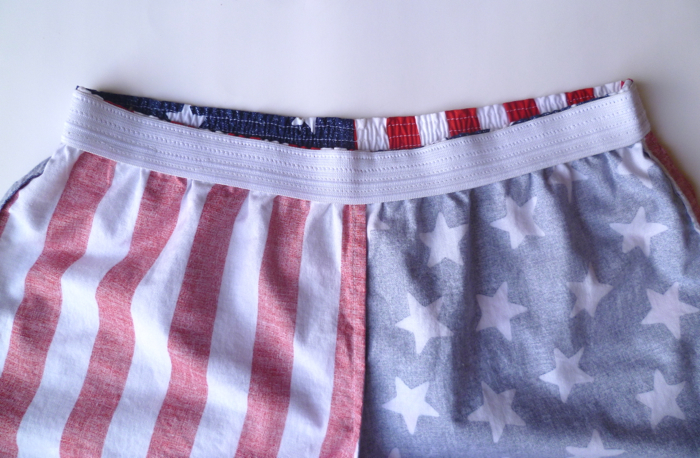
 It's no secret that I have a major clothes crush on culottes, and when I spotted this pattern in McCall's spring pattern line, I knew that skirt was destined to become a pair of cute and trendy culottes. First, I needed to deconstruct the skirt to see how much fabric I had to work with. It's hard to tell in the before pic, but the skirt is actually pleated along the drop waist so there was a bit more fabric hiding there. It had one front panel and two back panels with a center back seam (not sure why since it had an elastic waist??), so after I unpicked all the seams I had one larger panel, two smaller panels, and that whole elastic/drop waist thingy. I didn't take a picture of this step (boo) but the larger panel was about 30 x 30 inches and the two smaller panels were about 20 x 30 inches each.
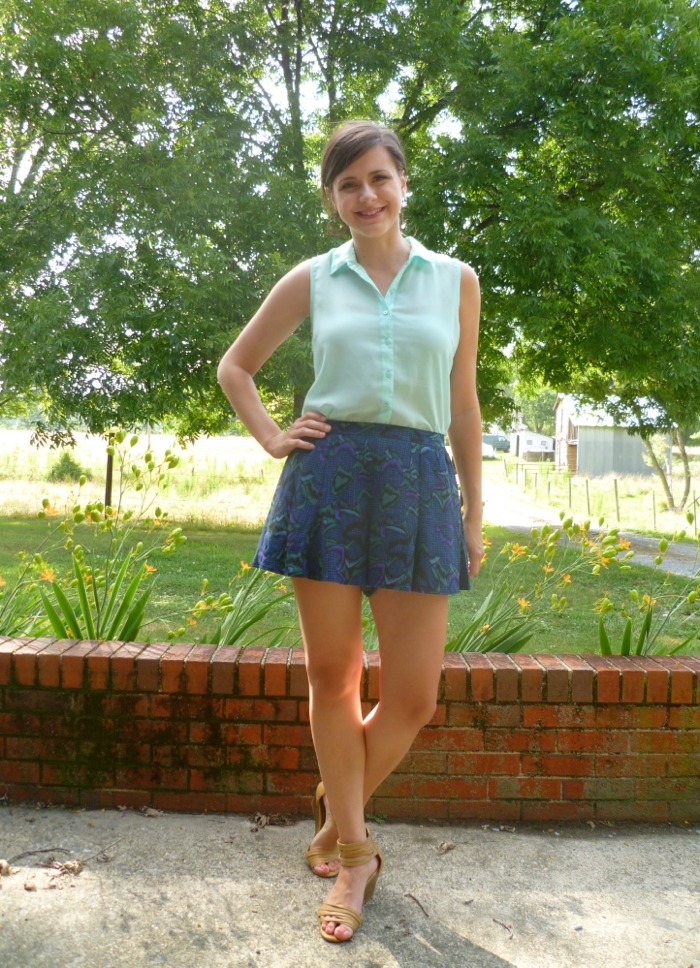
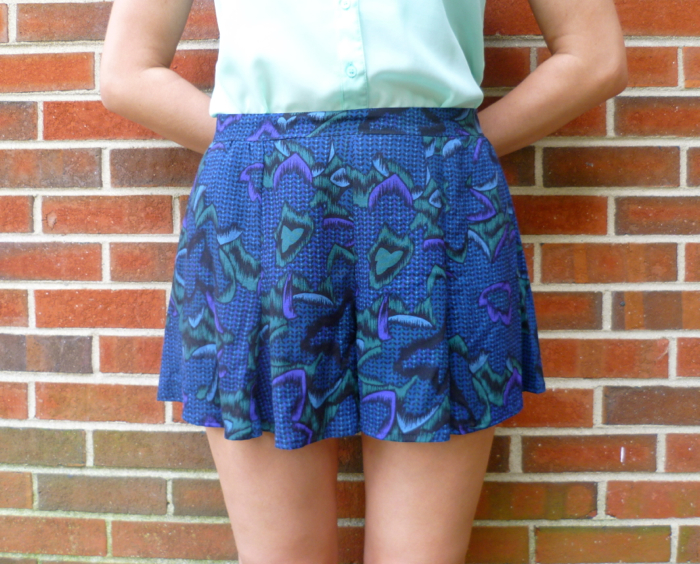
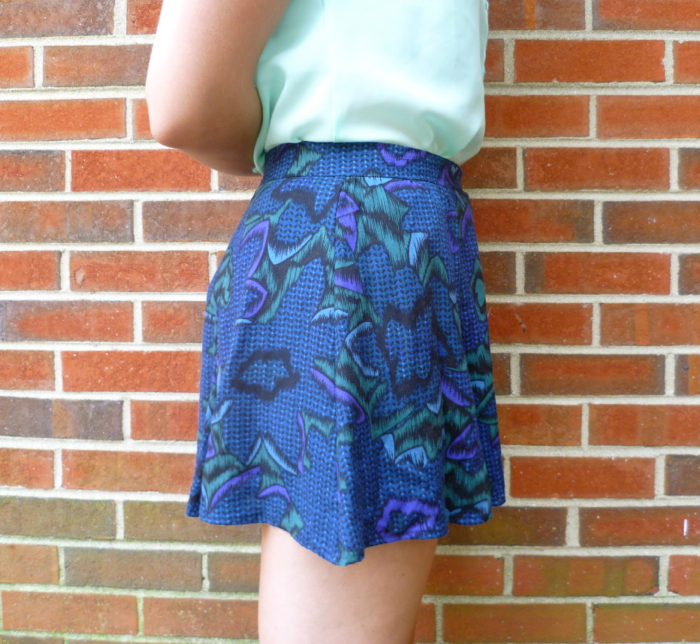
 The front and back princess seams on the McCall's pattern meant smaller pattern pieces that were easier to fit onto the smaller pieces of fabric, and I had just enough fabric to cut out all of the pieces including the waistband. I folded the larger piece in half and cut the side front and side back pieces from it, then placed the two smaller pieces wrong sides together and cut the front, back, and waistband with almost nothing left over. I didn't have nearly enough fabric to even attempt to pattern match, but with this print the seams and zipper pretty much disappear anyway.
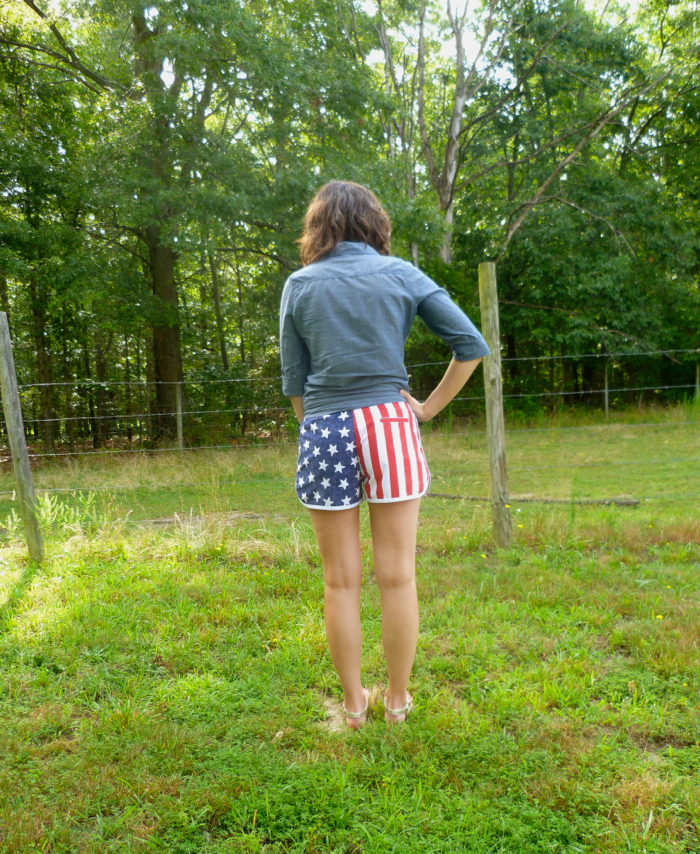
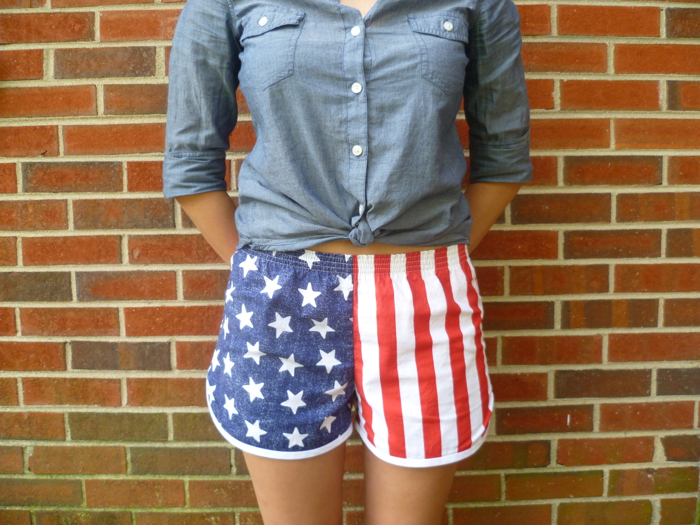
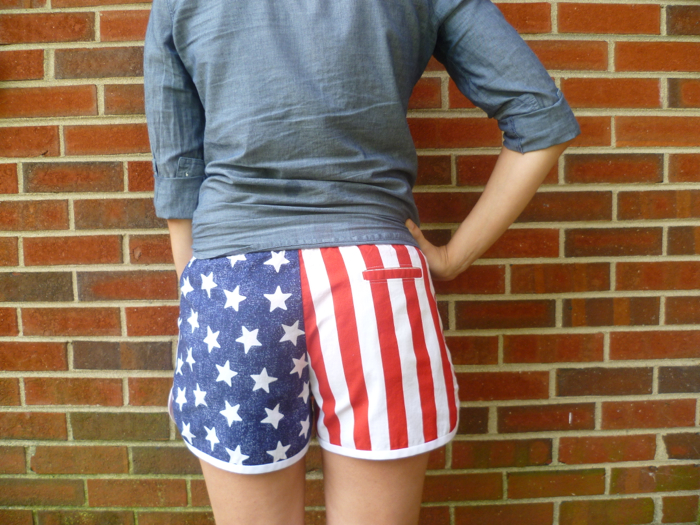
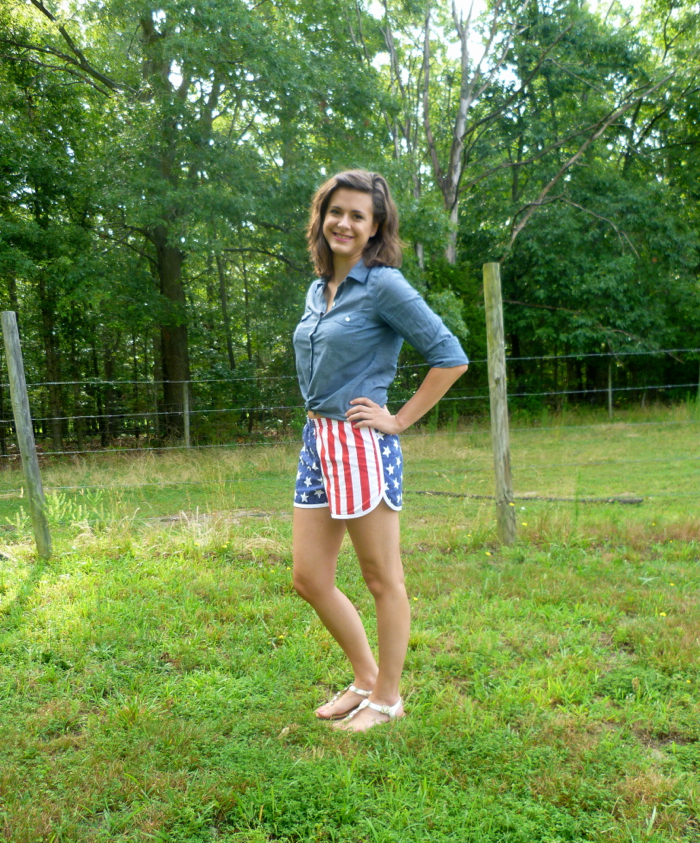
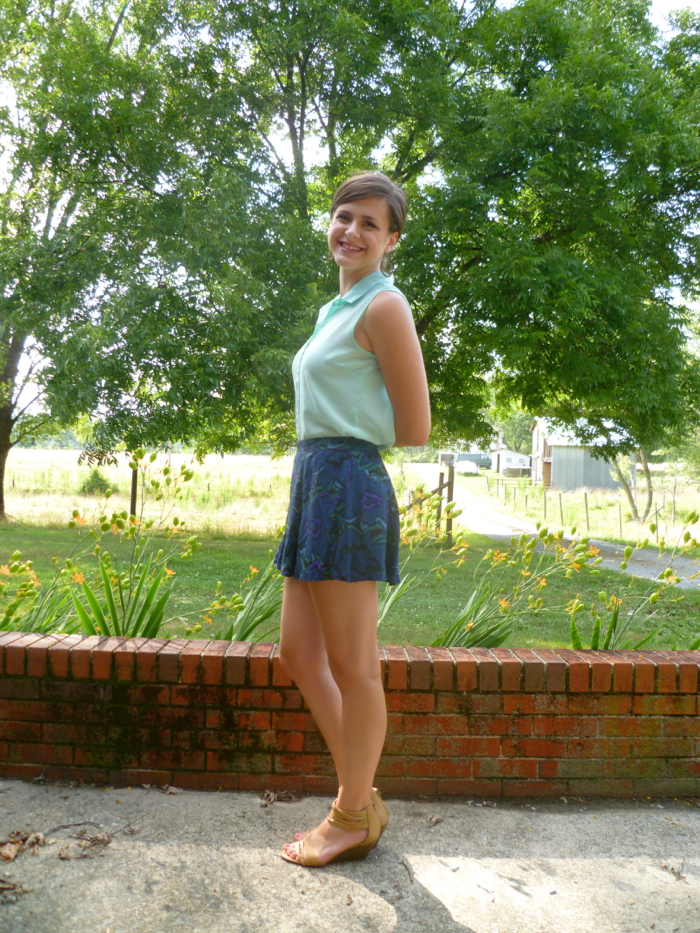
 The pattern directions were easy to follow, and since it is one of their Palmer/Pletsch patterns there are a bunch of tips for fixing fit issues and making pattern alterations. I sewed view B in a straight size 14 with no alterations (ironically not using any of those fit tips). I think this size actually sits a little lower on my waist that it is "supposed to" but it's very comfortable. And I'm going to go ahead and say what everyone is thinking: they are SHORT. If they actually sat on my waist where they were supposed to then they would be TOO short. I like short shorts so this length is fine for me, but if/when I make this pattern again I will probably add at least an inch to the hem, mostly for more butt coverage when I sit down.
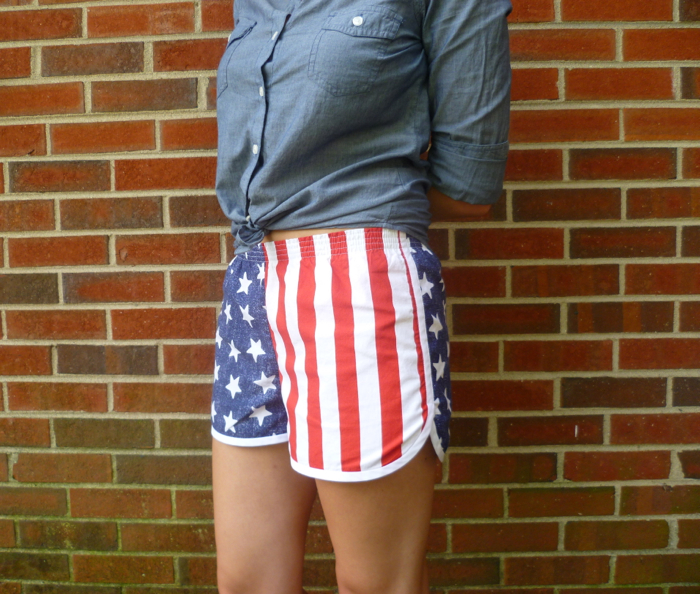
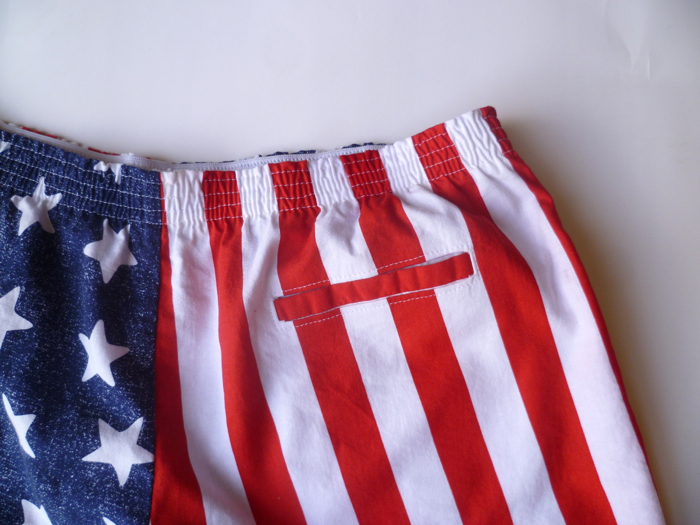
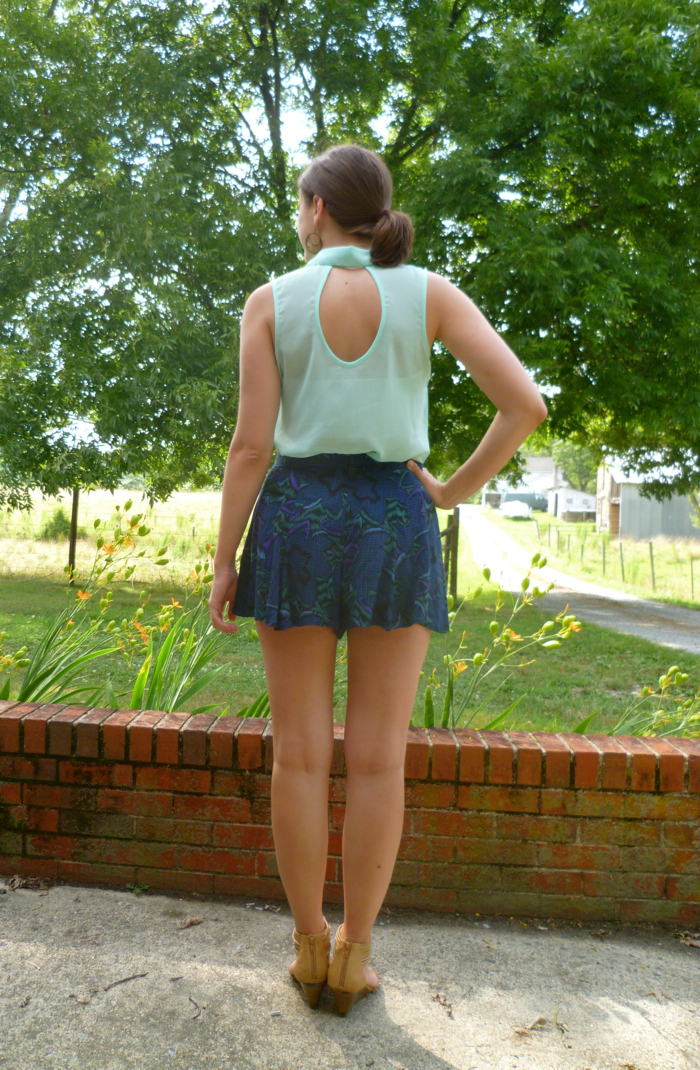
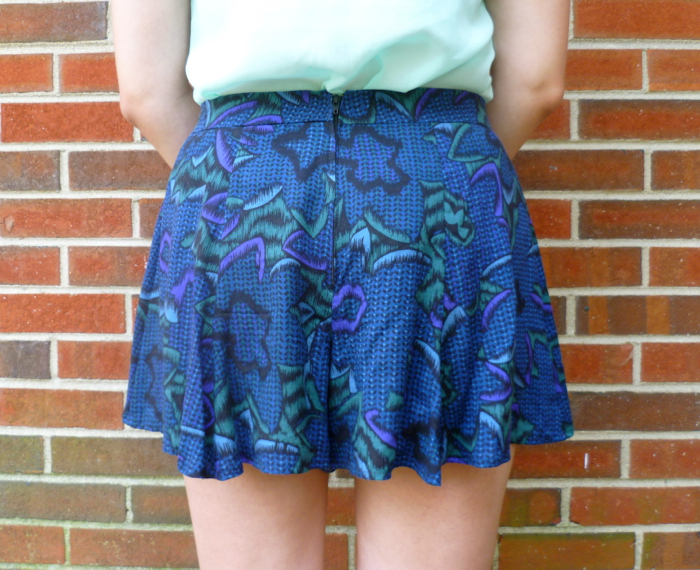 As far as construction goes, I used french seams on all the seams except the center seam with the zipper. I really do wish french seams and zippers could learn to resolve their differences (haha), but in the meantime I finished that seam by simply folding under the seam allowance and stitching it in place. I followed the directions in the pattern for a standard lapped zipper, but next time I will probably use an invisible one. The zipper is far from my best, but again the print on this fabric is super forgiving so I didn't stress it too much. The pattern recommends a blind hem, but I used a 1/4 inch double fold hem. The blind hem just seemed like a lot of work for a fabric that you can't even see the hem stitching anyway.
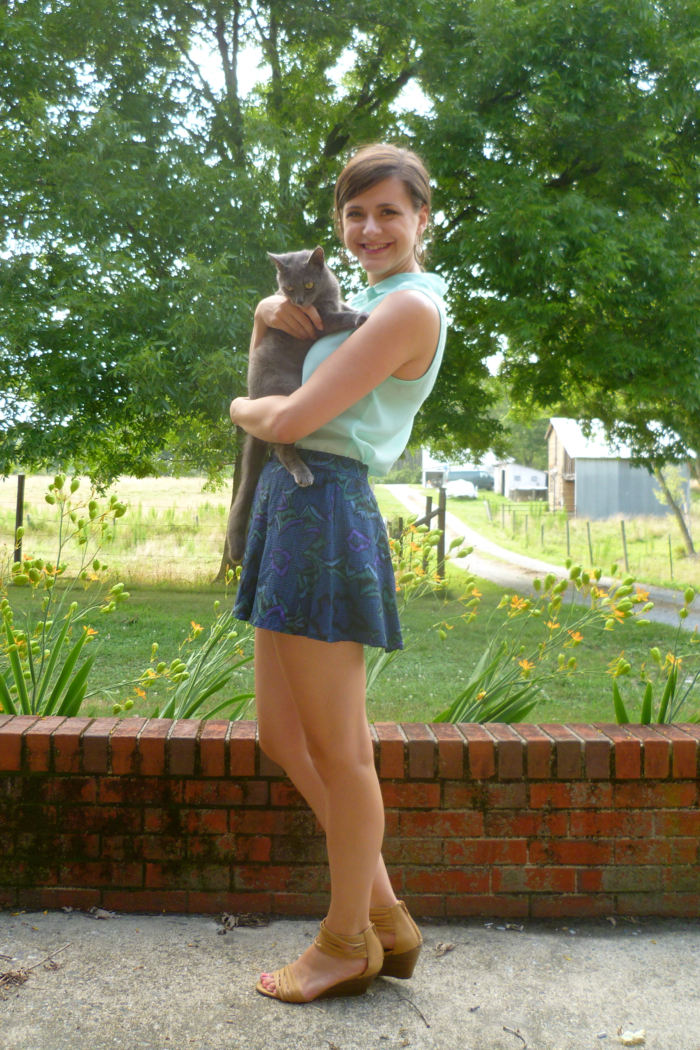 Of course I had to steal a picture with little Lu.
 Even with all the french seams this pattern sewed up pretty quickly, and I was able to succesfully take that dated skirt and make it into a modern pair of culottes that are now one of my favorite pieces in my wardrobe! And one of my favorite parts of this project? The price! Since I got the pattern at Hancock Fabrics during one of their $1.99 sales, the zipper during one of their 50% off notions sales, and I had thread and black interfacing on hand, it only cost me about $3!!
 I'm entering this project as part of the Summer 2014 Shorts on the Line Sewalong. Be sure to vote for my project, and all of your favorites, on Kollabora! Just click the little heart icon on the right hand side of the page to vote.
I know you're probably thinking it was a stroke of BAD luck that made me the owner of this seriously dated number, and you can tell by the look on my face in that picture that I knew I had some work to do. BUT THAT FABRIC! I immediately fell in love with the print, and it's a rayon challis so it has a lovely drape and feel. However, the elastic waistband, drop waist, and midi-length were not doing it any favors. No worries, I knew I could make it into something fabulous that I would actually wear. Enter McCall's 6965.It's no secret that I have a major clothes crush on culottes, and when I spotted this pattern in McCall's spring pattern line, I knew that skirt was destined to become a pair of cute and trendy culottes. First, I needed to deconstruct the skirt to see how much fabric I had to work with. It's hard to tell in the before pic, but the skirt is actually pleated along the drop waist so there was a bit more fabric hiding there. It had one front panel and two back panels with a center back seam (not sure why since it had an elastic waist??), so after I unpicked all the seams I had one larger panel, two smaller panels, and that whole elastic/drop waist thingy. I didn't take a picture of this step (boo) but the larger panel was about 30 x 30 inches and the two smaller panels were about 20 x 30 inches each.
The front and back princess seams on the McCall's pattern meant smaller pattern pieces that were easier to fit onto the smaller pieces of fabric, and I had just enough fabric to cut out all of the pieces including the waistband. I folded the larger piece in half and cut the side front and side back pieces from it, then placed the two smaller pieces wrong sides together and cut the front, back, and waistband with almost nothing left over. I didn't have nearly enough fabric to even attempt to pattern match, but with this print the seams and zipper pretty much disappear anyway.
The pattern directions were easy to follow, and since it is one of their Palmer/Pletsch patterns there are a bunch of tips for fixing fit issues and making pattern alterations. I sewed view B in a straight size 14 with no alterations (ironically not using any of those fit tips). I think this size actually sits a little lower on my waist that it is "supposed to" but it's very comfortable. And I'm going to go ahead and say what everyone is thinking: they are SHORT. If they actually sat on my waist where they were supposed to then they would be TOO short. I like short shorts so this length is fine for me, but if/when I make this pattern again I will probably add at least an inch to the hem, mostly for more butt coverage when I sit down.
As far as construction goes, I used french seams on all the seams except the center seam with the zipper. I really do wish french seams and zippers could learn to resolve their differences (haha), but in the meantime I finished that seam by simply folding under the seam allowance and stitching it in place. I followed the directions in the pattern for a standard lapped zipper, but next time I will probably use an invisible one. The zipper is far from my best, but again the print on this fabric is super forgiving so I didn't stress it too much. The pattern recommends a blind hem, but I used a 1/4 inch double fold hem. The blind hem just seemed like a lot of work for a fabric that you can't even see the hem stitching anyway.
Of course I had to steal a picture with little Lu.
Even with all the french seams this pattern sewed up pretty quickly, and I was able to succesfully take that dated skirt and make it into a modern pair of culottes that are now one of my favorite pieces in my wardrobe! And one of my favorite parts of this project? The price! Since I got the pattern at Hancock Fabrics during one of their $1.99 sales, the zipper during one of their 50% off notions sales, and I had thread and black interfacing on hand, it only cost me about $3!!
I'm entering this project as part of the Summer 2014 Shorts on the Line Sewalong. Be sure to vote for my project, and all of your favorites, on Kollabora! Just click the little heart icon on the right hand side of the page to vote.